Configuring And Amending Expense Types
Please note that this article only applies to People+ customers. Please speak to your Account Manager about this module.
In order for staff to be able to log expense claims on the Web Portal, administrators must first setup Expense Types in RotaMaster.
This is done under Personnel > Reference Settings;

To find Expense Types, open up the 'Other' tab in Reference Settings and click on Expense Type.
This will show a list of existing Expense Types.
To add a new Expense Type, click the green plus button, which will open the dialogue boxes shown below;

Name - A name for the Expense Claim - this will be displayed to staff members so should be clear
Click the little green plus button under Name/Sage Reference;
This second dialogue box allows administrators to enter a Maximum claim amount for this expense type, as well as a Start Date. Note - staff will not be able to make claims against this expense type for any date before the Start Date. Ensure that this is set to the past if retrospective claims are to be made.
Click Save, and then Save again.
This expense type is now live and will be viewable for staff on the Web Portal. Click here for more information on logging/viewing expense claims as a staff member.
Editing Expense Types
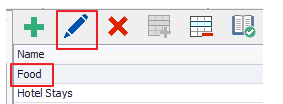
Expense Types can be edited at any time (Maximum and Start Date) by clicking on the Expense Type and clicking on the blue edit pen;

This will open the following dialogue box. If a Maximum/Start Date has been setup in error, click the edit pen and make the appropriate changes.

However, if a new Maximum Rate is going to be used as of a certain date, click the green plus button and add the new details and the appropriate go-live date for the new maximum rate. Click Save.

This will assign an End Date to the previous record and any claims made after 13/12/2017 (in this example) will be subject to the new maximum rate;
