➕ Sick Pay Configuration is available as part of People+. If you would like to learn more about this module, please contact your Customer Success Manager.
- Switching on Sick Pay Configuration
- Creating an enhanced configuration
- Setting: Don't pay sick unless a fit note has been added
- Full Time Weekly Hours
- Units
- Look-back Period (Months)
- Setting: Use Waiting Time
- Tiered Sick Pay
- Assigning Enhanced Sick Pay to a person or post
- Viewing enhanced sick pay allowances on personnel records
💡 Learn more about how to automate Statutory Sick Pay calculations
Switching on Enhanced Sick Pay Configuration
Enhanced Sick Pay is a feature available within People+.
Please reach out to our support team to request enhanced sick pay to be enabled.
Creating an enhanced configuration
- Open Configuration > Sick Pay Configuration

- To create a new enhanced configuration, ensure you are on the 'Enhanced Sick Pay' tab, click the 'green plus button' next to the 'Configuration Name' heading.

- Your new configuration will open, and you can begin to set up the sick pay approach for your organisation.
- Once you have created a new sick pay configuration, you can choose a unique name, specify the FTE weekly hours/units and define your rules & tiers for how pay should be calculated.

Setting: Don't pay sick unless a fit note has been added

This option aligns with what you have defined in Configuration > Default Settings > Defaults, as the "Days before Fit Note is required".

✅ When enabled, no sick leave will be paid after your defined "days before Fit Note is required" until a fit note is recorded against the sickness episode that covers the appropriate period. Once a fit note is added to the sickness adjustment, it will recalculate based on the date on the sicknote, including backdating if necessary.
❌ When disabled, sick leave will be paid in line with the assigned configuration regardless of your defined "days before Fit Note is required" or if a fit note has been recorded against the sickness episode, covering the appropriate period.
Units
Configurable in both days & hours, this allows you to align your approach to sick pay calculation with your staff members' units of leave.
💡 Only sick pay configurations that match the individual's leave units in their personnel record will be available for you to assign to their post(s).
Full Time Weekly Hours
Similar to annual leave configuration, here you will define what the FTE (full-time equivalent) is for those who will reference this sick pay configuration.
✏️ Full Time Weekly Hours example
Full Time Weekly Hours is set to 40.
My contracted hours are set to 22.
WTE % = contracted hours / full-time weekly hours (= 55%)
The WTE % is used to calculate how many paid hours someone is entitled to, pro rata & based on your tiered sick pay.
Look-back Period (Months)
The period that should be referenced when calculating & recalculating the value of adjustments, based on your tiered sick pay set-up.
✏️ Look-back period example
Look-back period is set to 12.
RotaMaster will check a rolling 12 months to determine how much sick leave someone has taken, against your configured tiered sick pay. This is then used to determine the percentage of pay someone is entitled to.
This includes any period that overlaps the look-back period, such as sick leave that started 13 months ago and prolonged into the 12 months.
Use Waiting Time
The amount of time for which no sickness is paid. This setting will also follow the units you have selected, either days or hours.
Waiting time is also prorated based on the individual's contracted hours.
✏️ Waiting Time example
Waiting Time is set to 5.
If your units are set to days, the first five days of sickness adjustments will have £0.00 value.
If your units are set to hours, the first five hours of sickness adjustments will have £0.00 value
Waiting Time is set to 5, and your FTE (based on contracted hours) is 50%.
Depending on your units, the first 2.5 days or 2.5 hours of sickness adjustments will have £0.00 value.
Tiered Sick Pay
In this section, you will configure: how many years someone should have worked for your organisation before they are entitled to sick pay; what percentage of pay they are entitled to, and how many hours or days (depending on how your units are configured) are in each tier.
Years of service indicate when pay should start, for example, if no sickness is paid for the first three months, the first tier will be 0 years and 3 months.
- Click the green plus button to the right of 'tiered sick pay'.

- Enter the start of the tier you are looking to create, then press the green plus button to add a level within this tier.

Years & Months: This is when the pay level will begin.
Levels: This is the number of days or hours that should be paid and at what percentage.
In this tier, no sickness will be paid for the first 6 months from an individual's start date. From month 6 to 1 year, the first three days of sickness will be paid at 100%. - You can then continue to build your tiers and levels.

From 1 year onwards, 5 days of sickness will be paid at 100%. After this, 5 more days will be paid, but at 50%. Once you have finished building your tiers, your sick pay configuration will look something like this...

For the above configuration:
- All sickness is paid regardless of whether a fit note is added to the episode.
- Sickness is measured in days.
- Tiers consider a 12-month history of sickness to calculate entitlement.
- No waiting time is used, and sickness is paid (at the appropriate tier) from day 1.
- (Tier 1) The first 6 months will be unpaid; from 6 months to 1 year, three days of sickness are paid at 100%, further sickness is unpaid.
- (Tier 2) From 1 year to 3 years, five days are paid at 100%, five further days are then paid at 50%.
- (Tier 3) From year 3 to 5, ten days are paid at 100%, ten further days are then paid at 50% and a final five further days are paid at 20%.
Assigning Enhanced Sick Pay to a post or person
Post
To roll out a sick pay configuration to everyone with a certain post...
- Go to Personnel > Post Manager
- Find your post and edit it
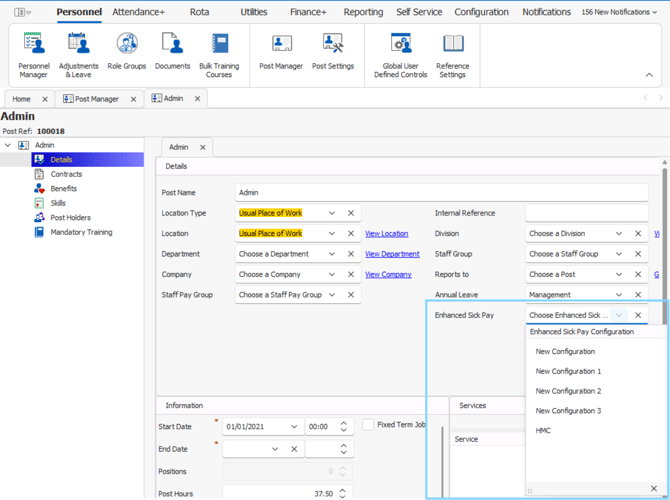
- In the Details section, choose a configuration from the Enhanced Sick Pay configuration
- Press Save or Save and Exit
- You will then be asked to confirm if you would like to change the configuration on personnel records which have this post.
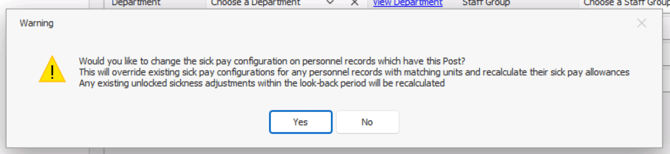
✅ Yes: This will override existing configurations for any personnel with matching units and recalculate their sick pay allowances. Only unlocked sickness adjustments within the look-back period will be recalculated.
❌ No: Personnel records that already have this post assigned will not have their sick pay configurations updated or sickness adjustments recalculated.
ℹ️ Anyone who you assign this post after this point, will have your selected sick pay configuration automatically assigned to them, should you select no.
Person
To assign or change a sick pay configuration on an individual's record...
- Go to Personnel > Personnel Manager
- Search for the member of staff and edit their personnel record
- Go to Posts > select their post > Details
- In the Details section, choose a configuration from the Sick Pay dropdown menu
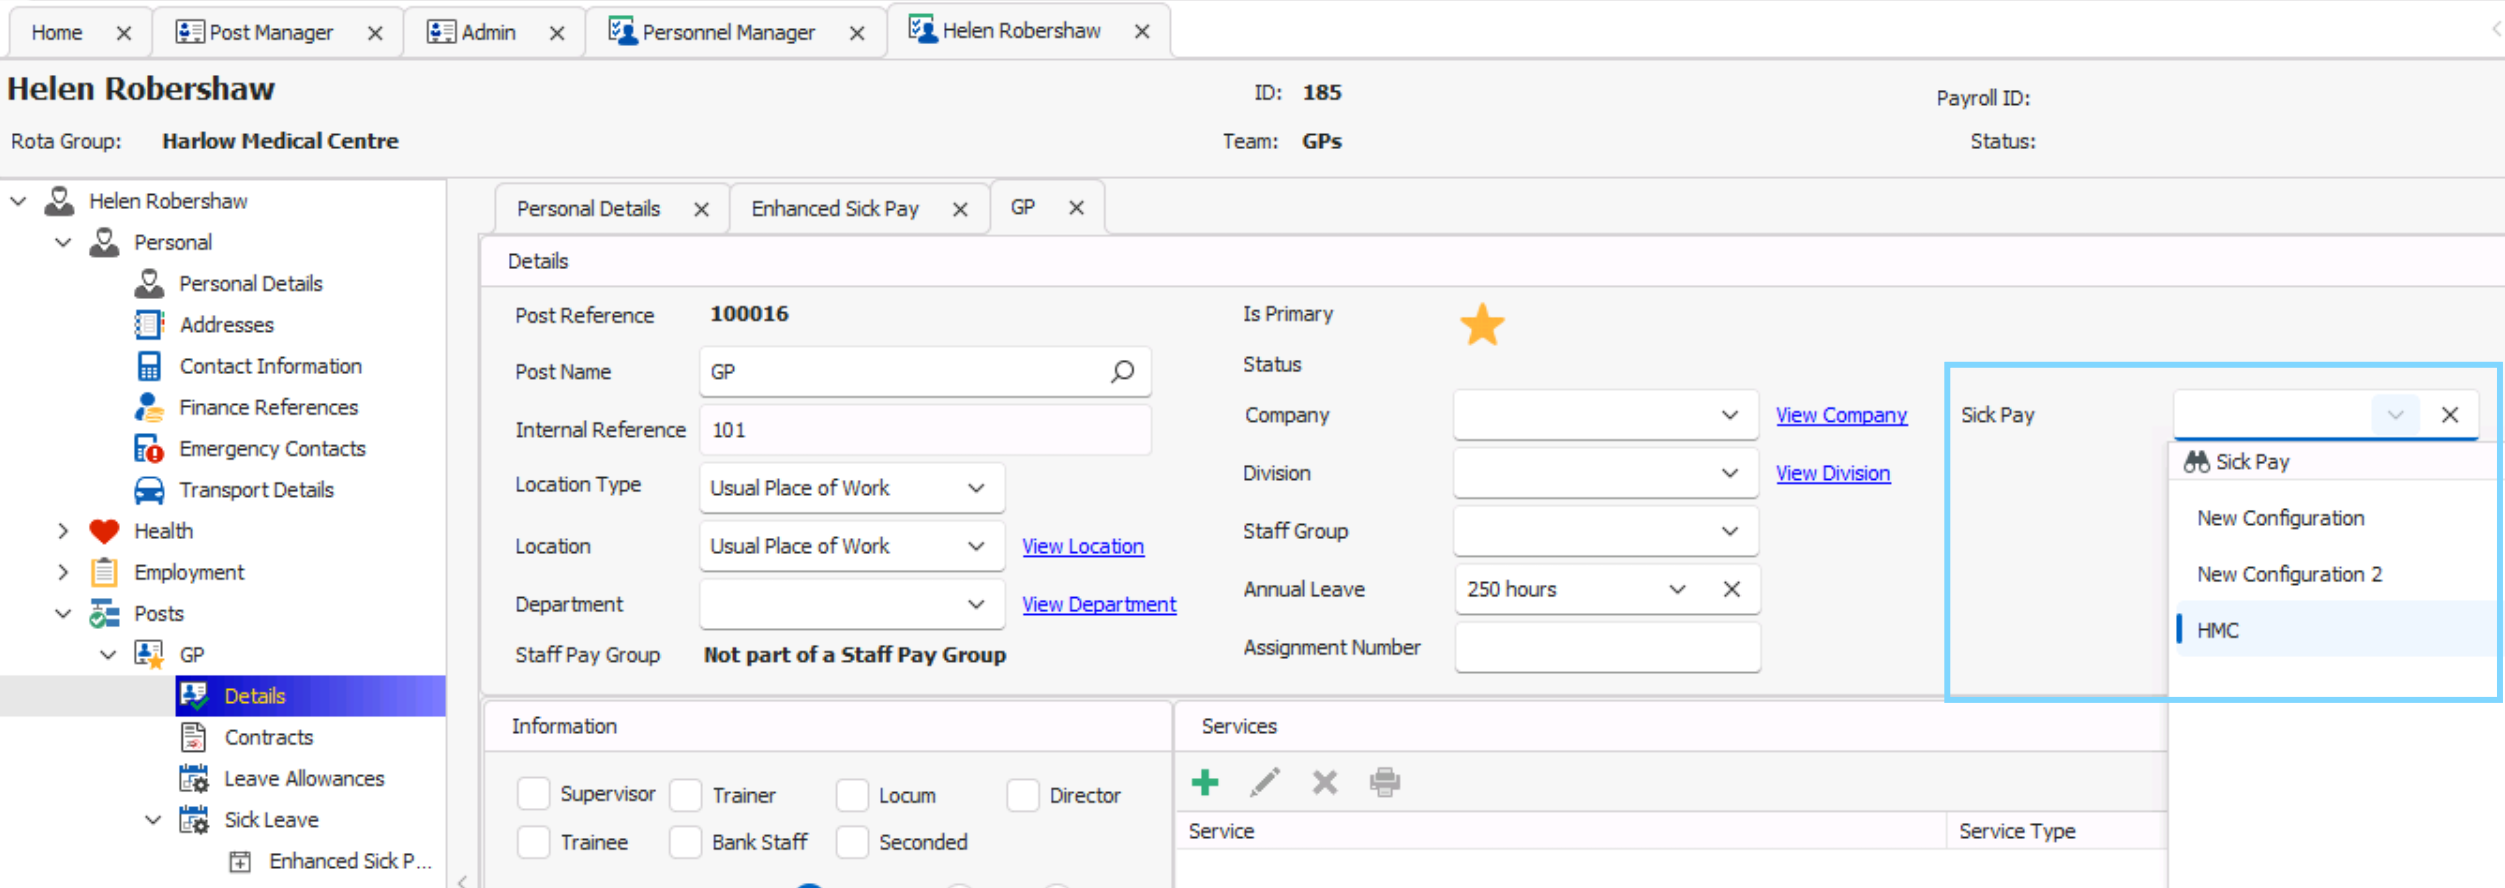
You will only be able to select configurations that have the same units as the individual.
💡 Find out more about leave units. - Press Save and the personnel record will be refreshed
Viewing Enhanced Sick Pay Allowances in Personnel Records
📅ℹ️ Enhanced sick pay allowances is configured based on a staff members employment start date.
In Personnel Record>Posts>Sick Leave> Enhanced Sick Pay , if you have the correct administrator permissions, you can view the remaining Enhanced Sick Pay allowances.

On this screen, you will see the different tiers of your enhanced sick pay, and how much allowance is remaining for each tier.

ℹ️ IMPORTANT: Enhanced sick pay allowance figures will only reduce when the adjustment within the sickness episode has a pay rate group assigned.
To check a pay rate group is assigned to a sickness, navigate to sickness management>find the sickness episode, edit the sickness record, then edit the adjustment in the lower half of the screen, add a pay rate group and click save.
The enhanced sick pay feature in its current form is built to use the pay rate group calculate the hours remaining, and the remaining pay entitlements. For this feature to to work for salaried staff you would need to assign a pay rate group to the sickness adjustments within the sickness records when they are being managed.
This may require you to set up additional pay rates/pay rate groups for salaried staff. To learn more about pay rates click here.