Room Allocation Set Up
Please note, this functionality is only available for customers on v i90 and above.
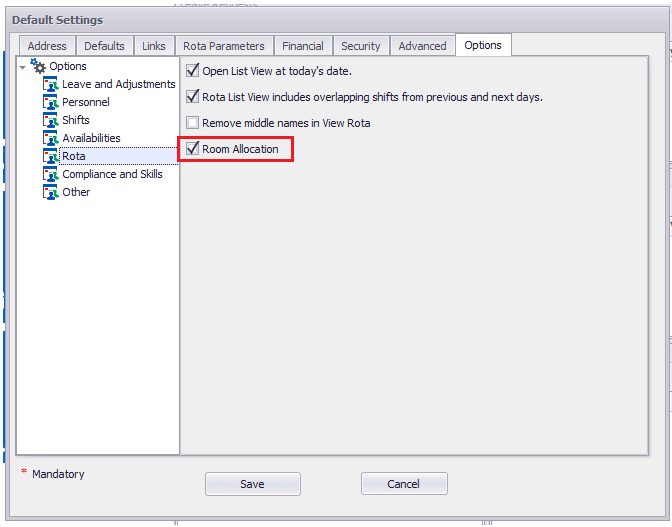
For the Room Allocation functionality to be active on the system you will first have to go to Configuration > Default Settings > Options > Rota and tick the option for Room Allocation:

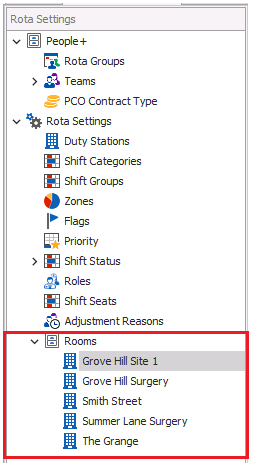
Once you have enabled the functionality on the system you will be able to go to Rota>Rota Settings>Rooms, click on the grey arrow to open up a drop down list of your Duty Stations:

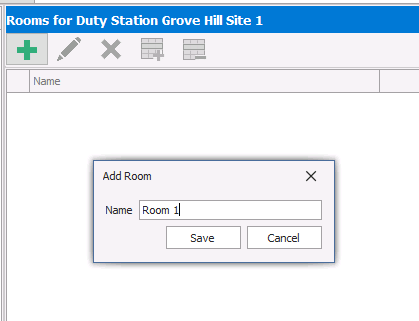
Select a Duty Station you want to configure Rooms for and press the green plus button, this will create a pop-up box allowing you to enter the Room name:

Once you have entered your Room name press Save and the Room will then be created for that Duty Station.
One Room name can be used for multiple Duty Stations, so for example if you had Room 1 in Grove Hill Site 1 and Room 1 in Summer Lane Surgery you would be able to configure this.
Once you have your Rooms configured you will be able to Blacklist/Whitelist them in Personnel Records and/or add them to shifts.