Please note that this article applies only to customers with RotaMaster People+.
Overview
Sickness Management Records hold all information about a sickness instance in RotaMaster including;
- Duration of Sickness (including Expected and Actual Return to Work dates)
- Shifts missed through sickness
- Sickness Category
- Absence Details
- Self Certification
- Fit Notes
- Return to Work Interviews
- Long Term Sickness Reviews
- Occupational Health Referrals
Sickness Records can be created through various different routes in the system. Primarily, they are created when removing a staff member from a shift in RotaMaster. Click here to learn how this works.
This creates a Sickness Record in the Sickness Management screen in Self-Service > Sickness Management;

This screen holds all Sickness Records (Open and Historic) for all staff members.
The filters on the left hand side can be used to view specific sickness records for a Rota Group/Team/Person/Date - always click the refresh icon to pull the relevant information through to the right hand side;

The right hand pane shows sick instances that meet the filter criteria;
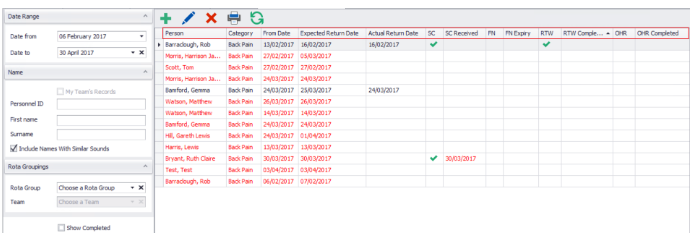
The information shown on this screen is;
- Person
- Sickness Category
- From and To Dates
- SC (ticked if a Self Cert is required)
- SC Received (populated with date of Self-Cert receipt)
- FN (ticked if a Fit Note is required)
- FN Expiry (Expiry of most recent Fit Note populated on system)
- RTW (ticked if Return to Work Interview is required)
- RTW Completed (date Return to Work Interview completed)
- OHR (ticked if Occupational Health referral is required)
- OHR Completed (date Occupation Health referral is completed)
Please click here to see how to set triggers for Self-Cert, Fit Note and Return to Work requirements.
Editing/Updating Sickness Records
To edit a Sickness Record, click on the appropriate record and click the blue edit pen;
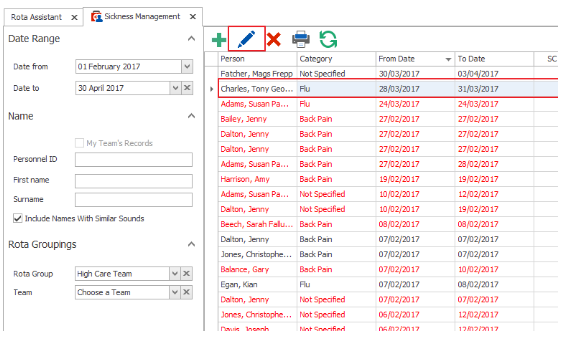
This will open the Edit Sickness screen. This screen can be used to edit;
- Sickness Category
- Expected Return Date (any shifts between From and Expected Return Date will show in the Adjustments Tab below and this person will be removed from those shifts)
- Actual Return Date (used once the employee has returned to work to record the actual return to work date)
- Self Cert - will be ticked if the sickness instance is over X days (as set here). NB - Once ticked, this opens up the Self-Cert option on the Web Portal for the employee to complete. Once completed, the date in Received will be populated and View will be accessible.
- Fit Notes - once ticked, History becomes accessible. Click here to find out about adding Fit Notes.
- Return To Work Interview - Edit and Add Doc become accessible once Required is ticked after the appropriate period has passed (as set here).
- Long Term Sickness Review - will be ticked if the sickness instance is over X days (this can be set here)
- Occupational Health Referral - this can be manually ticked if the staff requires occupational health visits
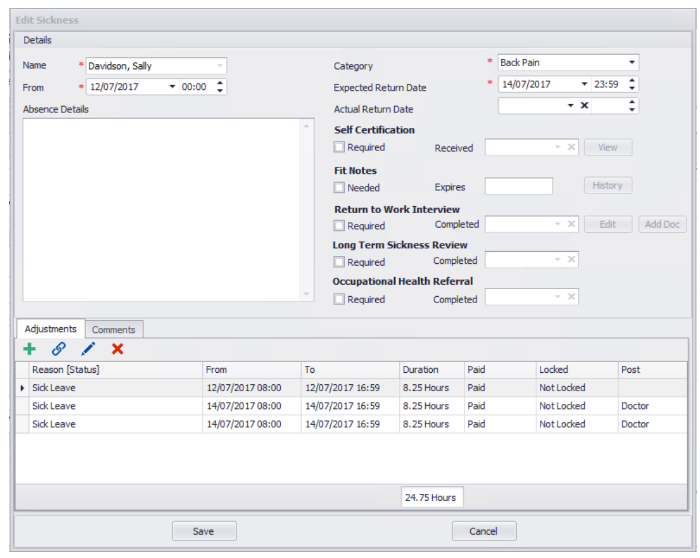
The Adjustments section at the bottom of the screen shows all shifts that this person has been taken out of during this sickness period and the Adjustment Reason assigned to it;

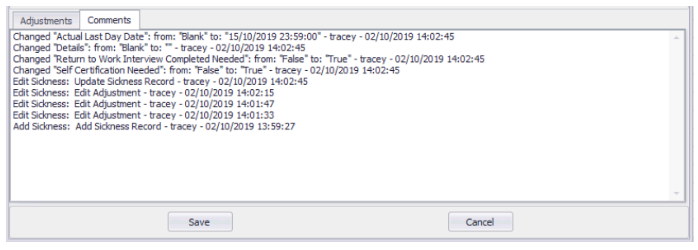
When editing a Sickness Record, you will be able to see, in the comments section, what has been edited and who has edited it.
These adjustments can be edited individually if required by clicking the adjustment and then clicking the blue edit pen.
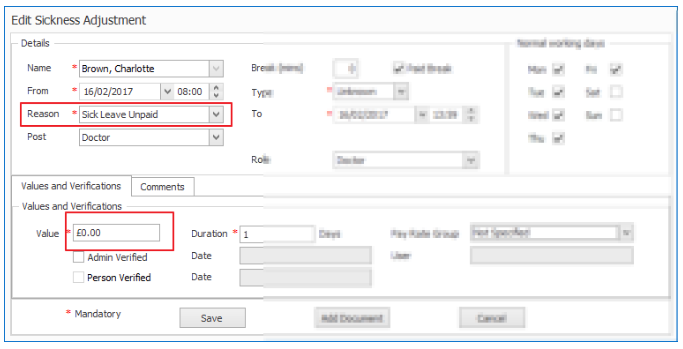
This might be necessary if an individual has been off sick for a number of weeks and their paid sickness period has come to an end.
Adjustments beyond the Paid Sickness period could be amended to non-paid adjustment reasons. Find out how to set up paid and non-paid adjustment reasons here - Adjustment Reasons.
Marking a Sickness Record as Complete
Sickness Records can be marked as complete without submitting the relevant Self Cert, Fit Note or Return to Work Interview information. This can be done by selecting the Sickness Record and clicking "Mark Sickness as Complete":

This will then close the record.