
This guide is only relevant if you have moved to the new Rotamaster, please get in touch with your customer success manager to find out more.
|
New RotaMaster When you select a file in New RotaMaster, your computer’s file browser opens directly. Choose the file from your computer and continue with the upload. |
Upload a document to a personnel record
1. Find and open the personnel record
Go to Personnel > Personnel Manager, search for the person and open their personnel record.
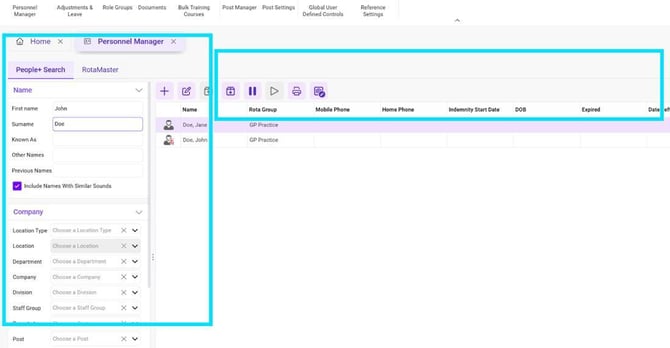
Use Personnel Manager to find and open the required person.
2. Open Documents
From the person’s record, select Documents from the left-hand menu. Existing documents will be shown in the document list.
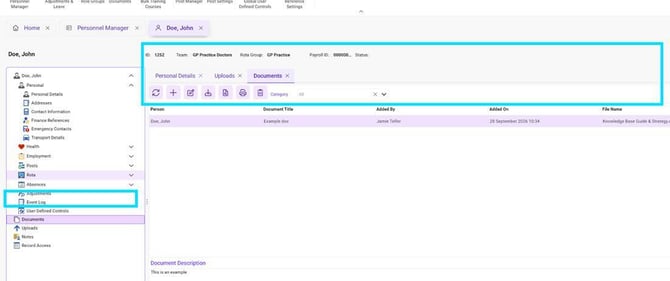
The Documents area shows documents already held against the personnel record.
3. Add a new document
Select the + button in the Documents area. The Add Document window opens.
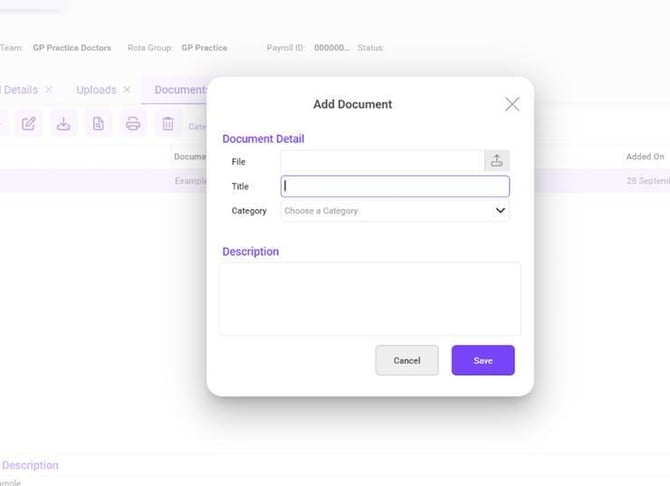
Complete the document details in the Add Document window.
4. Choose the file and save
Select the file button beside File. Your computer’s file browser opens. Choose the required file and select Open.
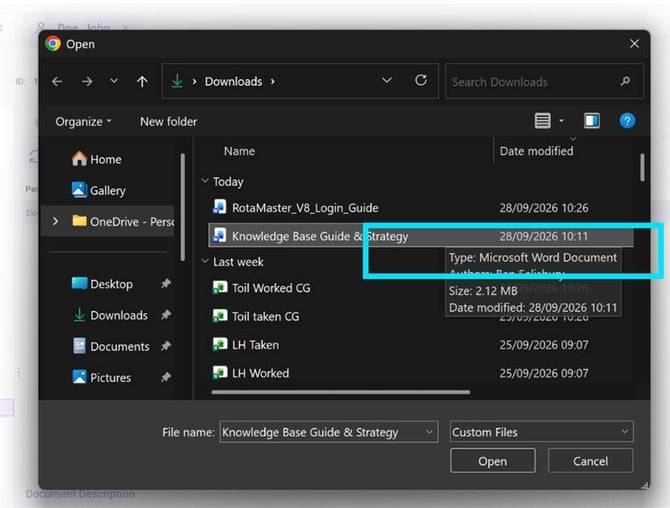
New RotaMaster opens the file browser on your computer so you can select the file directly.
Confirm the Title, choose the appropriate Category, add a Description if required, then select Save. The document will then be available from the person’s Documents area.
Attach a document to a qualification
You can add the supporting document as part of the qualification workflow. This keeps the file linked to the qualification rather than relying on a separate general document upload.
1. Open Qualifications
From the personnel record, expand Employment and select Qualifications. Select the + button to add a qualification, or select an existing qualification and use the edit button.
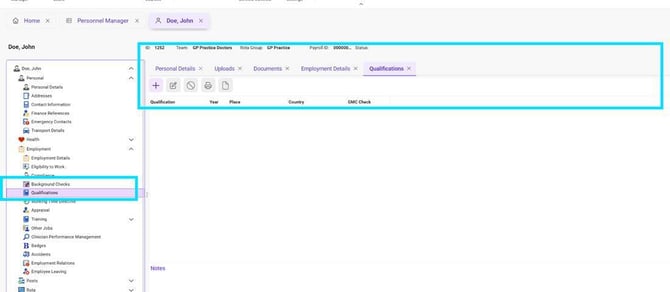
Open Employment > Qualifications from the personnel record.
2. Complete the qualification details
Enter the required qualification information. When the details are correct, select Save.
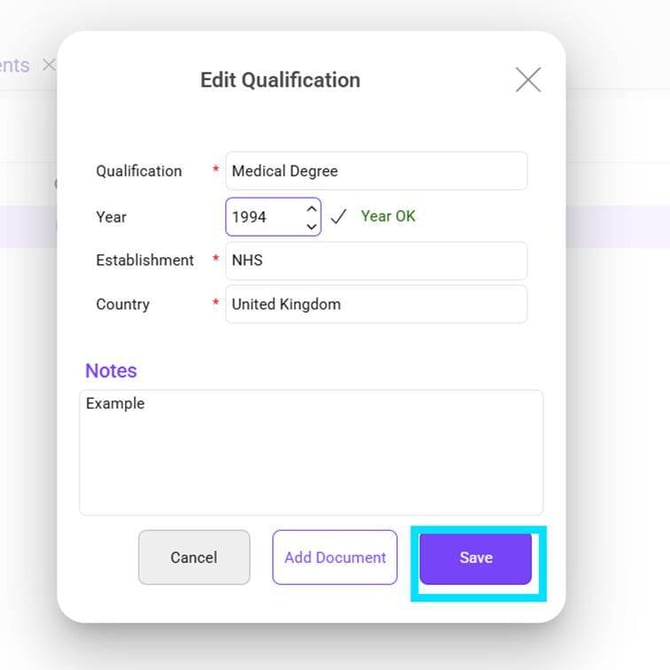
Complete the qualification details before saving.
3. Choose whether to add a document
After saving the qualification, RotaMaster asks whether you want to add a document to the qualification. Select Yes to continue with the upload.
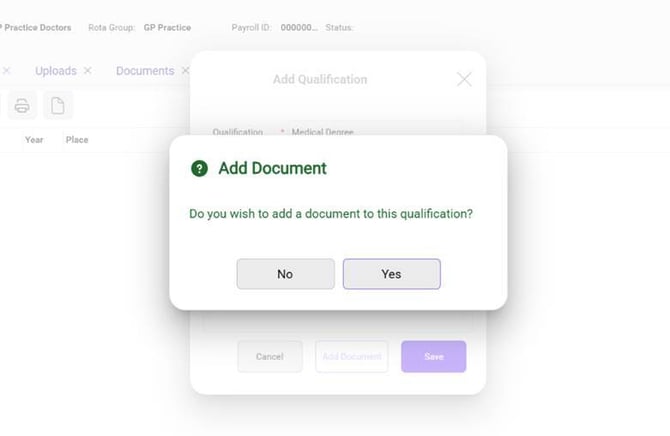
Select Yes to add supporting evidence to the qualification.
4. Add and save the supporting document
The Add Document window opens. The Category is automatically set to Qualifications. Select the file, confirm the title and description, then select Save.
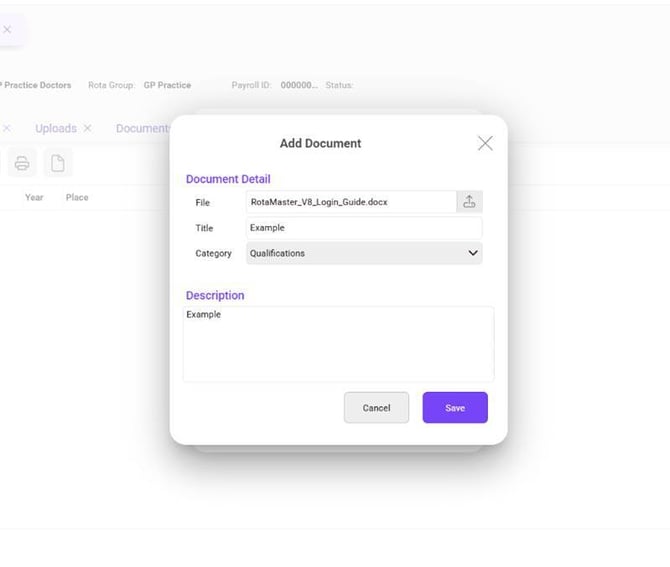
For this route, the Category is automatically set to Qualifications.
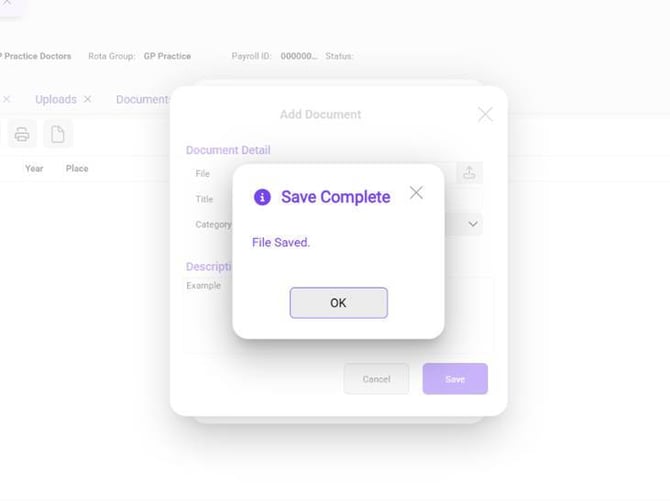
A Save Complete message confirms that the document has been saved.
|
Useful to know: The Edit Qualification window also includes an Add Document button. This can be used when you need to add supporting evidence while working on an existing qualification. |
View documents linked to a qualification
Select the qualification in the list, then use the document icon immediately to the right of the printer icon to access documents linked to that qualification.
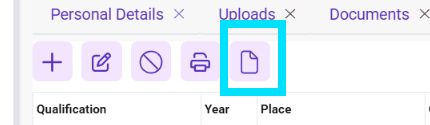
Select the qualification, then use the document icon to access its linked documents.
|
Important: If you are adding a qualification, check the qualification details before saving. The document upload is linked to the qualification workflow, so the underlying qualification should be correct first. |
If the document does not upload
- Confirm that you selected a file from the file browser before saving.
- Check that the document title and any required fields have been completed.
- If you are adding evidence to a qualification, confirm you used the qualification document route so the document is linked to the correct record.
- If the document appears in the list but cannot be opened, contact RotaMaster Support with the affected person, document title and a screenshot of what you see.