➕This feature is available as part of, Documents+ People+. If you would like to learn more about these modules, please contact your Customer Success Manager.
Importing documents on to a Personnel Profile can be used to upload documents for Administrators to view.
ℹ️You can only upload the following file types to RotaMaster: .jpg .jpeg .png .bmp .doc .docx .xls .xlsx .rtf .txt .csv .pdf
1. Importing a single document into RotaMaster
2. Bulk importing documents into RotaMaster
3. Importing a document to a 'Personnel Profile'
Importing a single document into RotaMaster
To upload a single document to RotaMaster click on the drop-down arrow at the top of the screen:

This will show the following menu:

Click on the “From PC to Server” button shown above.
This will open your devices document/file path browser:
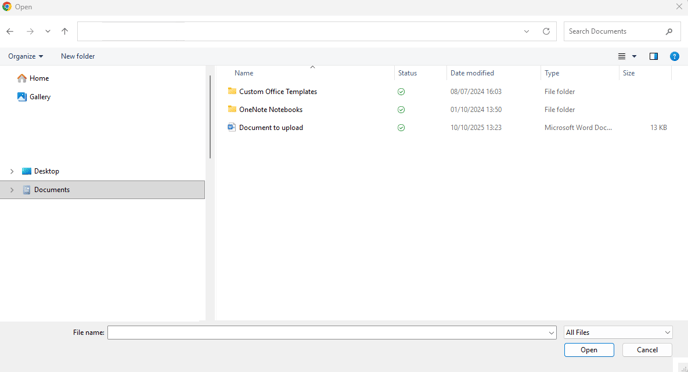
Find the file you want to upload and double click on it. This window will close once the document has been uploaded successfully.
Bulk importing documents into RotaMaster
Documents can also be uploaded in bulk by clicking the drop-down arrow at the top of the screen and clicking ‘File Manager’:

This will open the following window on the bottom right of your screen:

Click on “Click or drop files to upload”
![]()
This will open your devices document/file path browser:
Click on the file you want to upload or hold ‘Ctrl’ on your keyboard and select more than one, and press ‘Open’. This will cause the window to close and you will see your files in the ‘File Transfer’ Box:
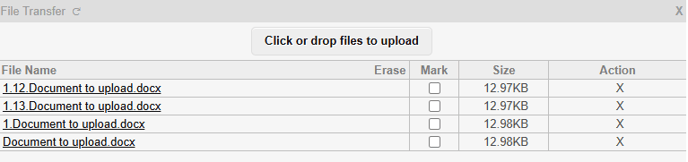
💡If you have your devices document/file path browser open on another screen, you can drag and drop into the 'File Transfer' screen to bulk upload documents.
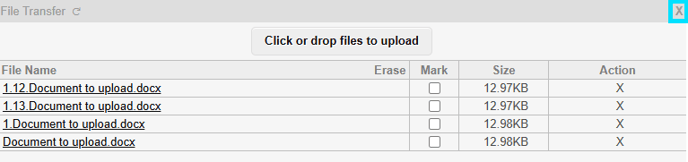
You can then click on the ‘X’ on the top right of the box to close it.
These files will then be available to upload to a Staff Member’s Personnel Profile
Importing a document to a 'Personnel Profile'
Navigate to Personnel > Personnel Manager and find the appropriate staff member:

If the document(s) you have imported to RotaMaster, links to a specific topic, i.e absences, compliance, appraisals etc. There are various areas within the personnel profile where you can add in the relevant information and it will prompt you to add a document.
❗Some of the sections within the employee profile may only be accessible if you have People+ - If you are unsure, please speak with your Customer Success Manager.
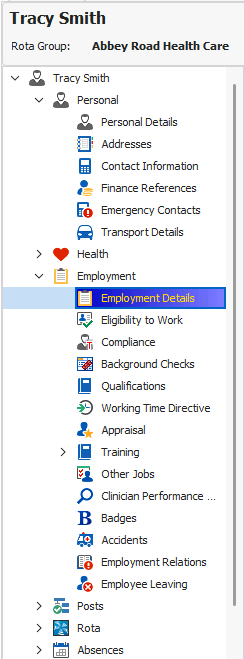
The example we will use in this guide is uploading a document against a qualification.
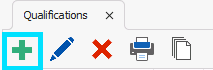
Navigate to 'Employment', click 'Qualifications', and click the 'green plus' to add in qualification details against the personnel record.
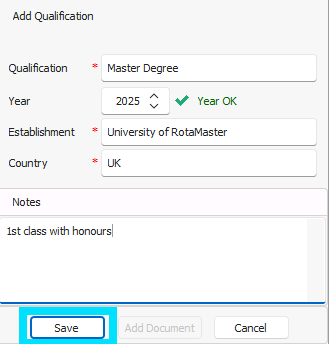
Populate the information for the qualification you are recording, and click ' Save'.
You will then be asked if you wish to upload a document to this record. Click 'No' if you do not wish to upload a document, but in this example we do want to upload a document, so we will click 'Yes'. 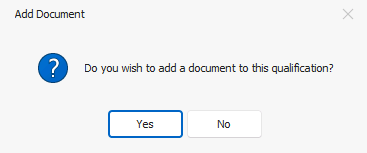
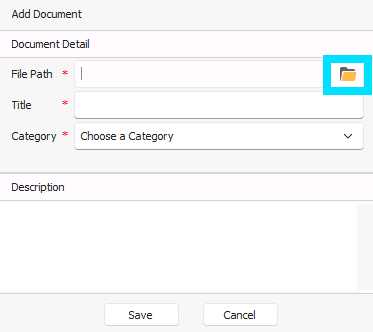
The 'Add Document' window will appear
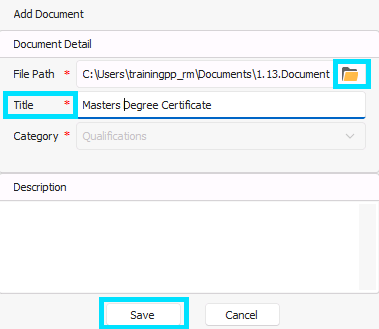
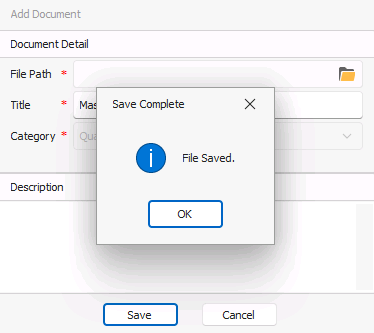
Select the yellow folder icon to select the files from those you will have imported earlier into RotaMaster and give the document a Title. As you have added a document within the qualifications you will notice the document 'Category' has prepopulated. You can then click save.
You will received confirmation that the file has been saved.
You will then see the qualification information in the qualifications tab.
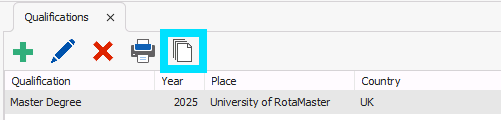
Click the 'paper' icon to manage the document attached to this qualification record.
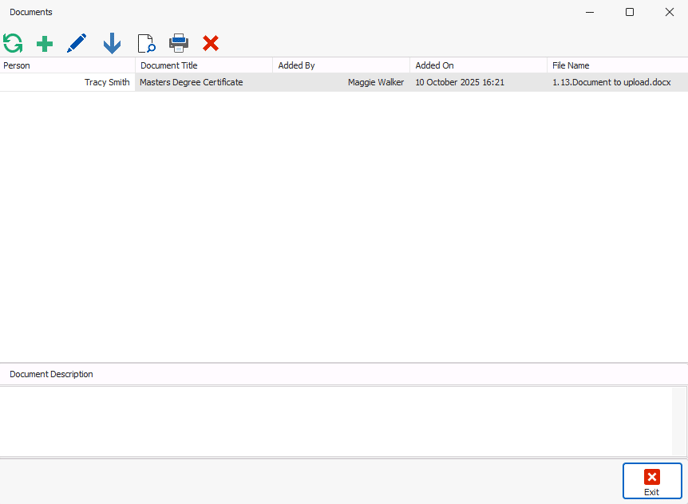
![]() The 'green plus' icon will allow you to add additional documents to this qualification record.
The 'green plus' icon will allow you to add additional documents to this qualification record.
![]() The 'blue pencil' will allow you to edit the document 'Title', Category, and description.
The 'blue pencil' will allow you to edit the document 'Title', Category, and description.
![]() The 'blue arrow' icon will allow you to download the document from RotaMaster.
The 'blue arrow' icon will allow you to download the document from RotaMaster.
![]() The 'paper with a magnifying glass' icon will allow you to view the document within RotaMaster, without the need to download the document.
The 'paper with a magnifying glass' icon will allow you to view the document within RotaMaster, without the need to download the document.
![]() The 'printer' icon will allow you to print the document.
The 'printer' icon will allow you to print the document.
![]() The 'red cross' icon will allow you to delete the document.
The 'red cross' icon will allow you to delete the document.
The second way of adding document to a 'Personnel Profile' , is to click on 'Documents'

This will open the 'Documents' tab to the right side of your screen:

Click on the green plus, and the 'Add Document' window will appear. Click click on the file icon.
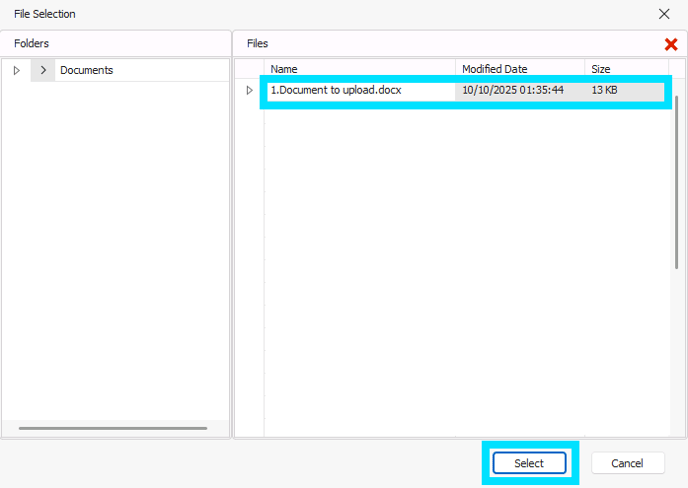
This will open the 'File Selection' window, select the file you wish to upload, and click 'Select':
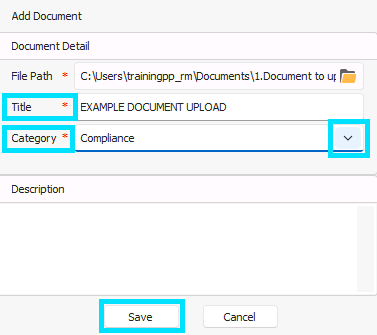
Give the file a 'Title' and select a 'Category' from the drop down, then click ‘Save’.
💡Document categories can be configured in reference settings.
This will cause the pop-up box to close and will show your file in the Personnel Profile:

Click 'Save and Exit' at the bottom of the screen to close the 'Personnel Profile'.

You can view all documents added to a 'Personnel Record' by clicking the 'Document' tab. You can then filter on the 'Category' drop down, and use the icons mentioned above to manage the documents linked to the profile. It will also have the details of who add the document, and when.
![]()