Downloading availabilities & allocating shifts
The 'Manage Availabilities' screen allows you to view and manage all logged availabilities from Staff Hub and action them without the use of the Availability Allocation Wizard.
To use this function go to Rota > Manage Availabilities:
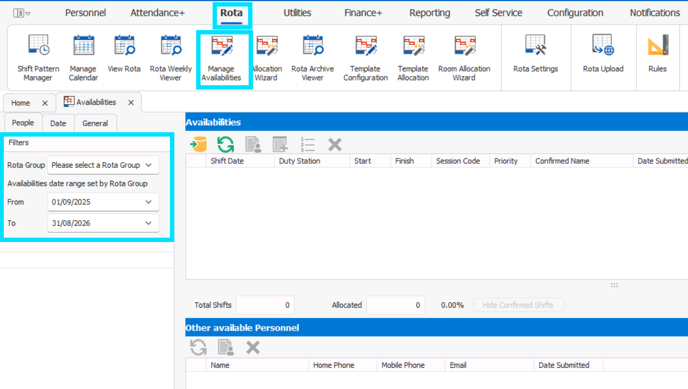
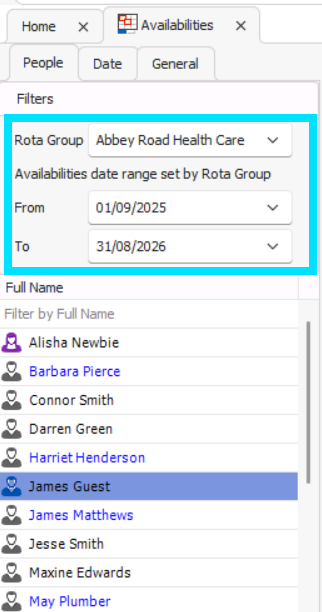
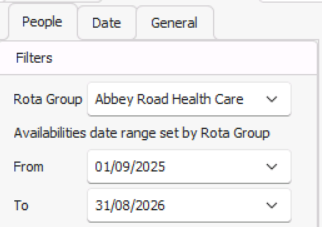
Using the filters on the left hand side choose a 'Rota Group' and 'Availabilities date range' to bring up a list of Personnel:
Next, click the Download Availabilities button. You will be asked to confirm your date range. Pressing confirm here will download availabilities for all shifts within that date range:
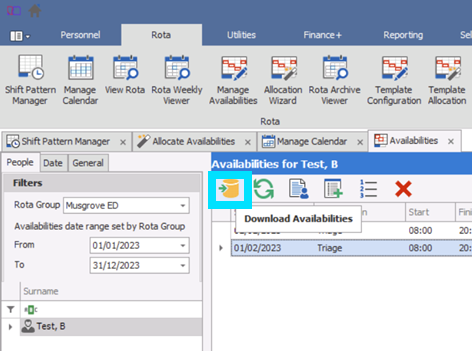

❗If you are using version 156.2 and above of RotaMaster, availabilities will automatically download into the Rota>Manage Availabilities area.
Click on a staff member to bring up their logged shifts - these will appear on the right hand side of the screen in the 'Availabilities for' section.
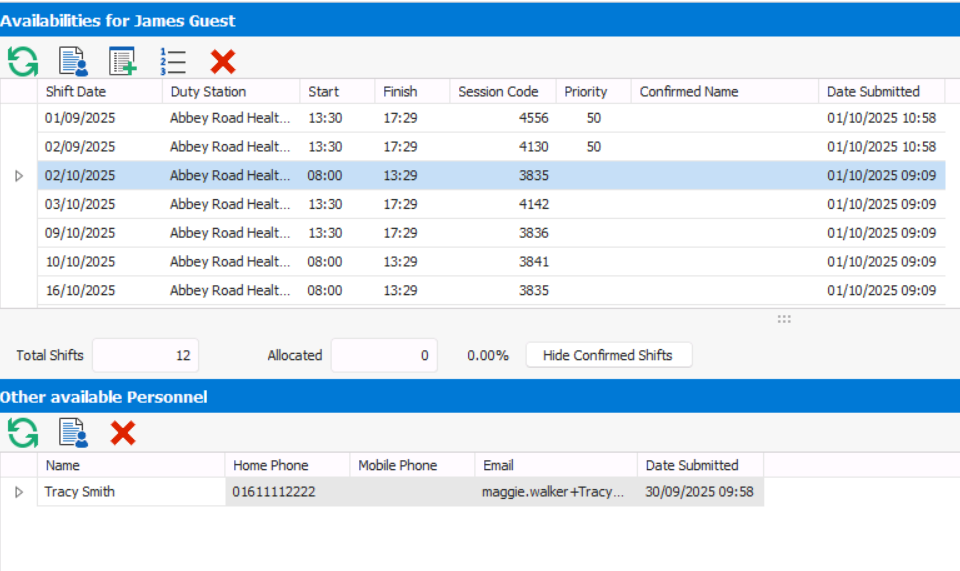
'Other available personnel' will show you a list of other staff members who have also logged their availability for that shift.
To action a shift click on one of the following buttons:
| Allocate Person | This allocates the selected staff member to their requested shift | |
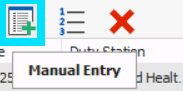
| Manual Entry |
You can use this function to manually record availabilities for that staff member to be used by the Allocation Wizard. |
|
| Priorities | This allows you manually add priorities to a particular staff member, team, person role, shift role, shift group, zone or person subtype | |
| Delete | You can delete selected logged availabilities using this button |
Should you wish to allocate to a staff member in the 'Other available personnel' section, ensure you are clicked on that staff member before clicking the allocate button.
Manually Allocating Shifts
You can also manually enter a staff members availability, on the 'People' tab, within Manage Availabilities.
First, choose your 'Rota Group' from the Filters menu on the left.
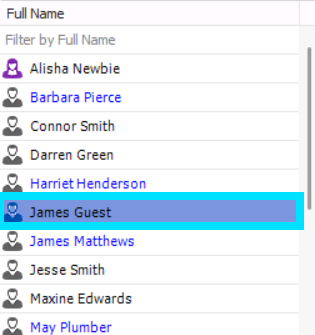
Select the staff member you wish to add a manual entry for.
Next, press the 'Manual Entry' button.
In this screen, you can select a date range by changing the 'Start & End Date fields'; filter by 'Role', 'Zone' & select/change the 'Person' you would like to add availabilities for.
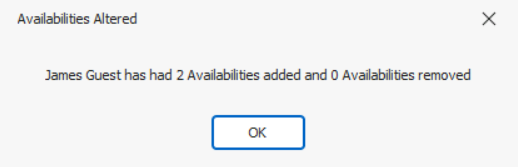
Tick the box to the left of each shift that you would like to create availability for, and press the 'Build Availabilities' button.

A message will then display, confirming that availabilities have been added for that member of staff.
To finish the process in assigning staff based on their availabilities, continue from the instructions above, locating the shift wish to allocate and using the ![]() 'Allocate Person' button.
'Allocate Person' button.