To create rotas, you'll need to create a calendar in RotaMaster. This process rolls your shift patterns (see here) into a live calendar period so that you can then allocate shifts accordingly using various allocation methods.
Calendars can be created as far in advance as you need as Staff Members will not see shifts until you upload a certain time period using Rota Upload.
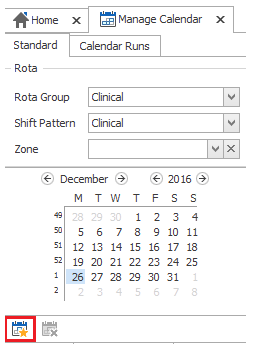
The first stage in creating a live rota is creating a calendar in the Manage Calendar screen. This is accessed by clicking Rota > Manage Calendar as shown below;

Please note - Special days MUST BE SCHEDULED before the calendar is rolled out for a period. For more information on Special Days, please see Special Days
To schedule a Special Day, ensure that the correct Rota Group and Shift Patterns are selected using the drop down boxes and click on the Add Special Day button shown below.
This will open the screen below. Select the appropriate Shift Pattern, Zone (if only creating a Special Day for one Zone), Day (Special Day list), date and Description.
NB - Zone and Description can be left blank if not applicable.
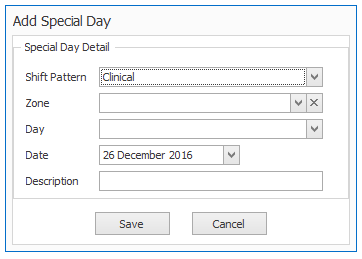
Click Save.
After scheduling the Special Days for a period, you are ready to roll out the calendar.
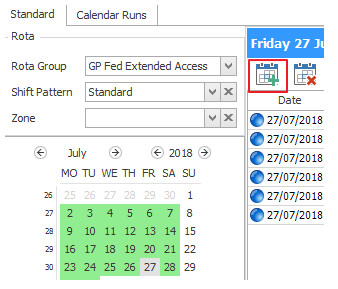
To create a calendar, select the appropriate Rota Group on the left hand side. If the Rota Group has more than one shift pattern configured in Shift Pattern Manager, you can also select which pattern(s) to pull the shifts from.

Click the 'Create Calendar' button;
Select the dates that you would like to create a live calendar for. If you are rolling out a multi-week pattern, ensure that you are starting this rollout from the appropriate week. For example, if 'Standard' is a 4 week shift pattern and you finished the last rollout on week 3, this should be set to '4'.

Click Create.
This will take the shifts from the Shift Pattern and roll them into a live calendar.
If there are Default People in the shifts in the Shift Pattern, all system rules will be checked at the point of clicking Create. If the system finds any issues, the screen below will be shown highlighting the issues.

The top half of this screen outlines Non-Overridable Rules including No Contract (People+ only), Annual Leave and Sickness during the calendar period. These people will be removed from their default shifts.
The lower half of the screen highlights any rule breaks, which can be overridden by ticking next to each issue.
All of these issues can be selected by ticking the top tick box next to Person. Once all overrides have been selected, click Override. You will then be prompted to enter an override reason;

Enter a reason and click Override.
Click OK and then click Continue on the next screen.
The system will warn you that any people with unresolved rule breaks will be removed from their default shifts;
Click OK.
The calendar has now been created. If there are multiple patterns to be rolled out over this period then repeat the above steps.